DIY for Beginners: 10 Easy Tasks to Get You Started
If you’re one of the 33% of Brits who doesn’t know where to start, getting into DIY can be easier said than done.
Luckily, for those Brits who don’t know their flatheads from their Philips, the experts at Victorian Plumbing have put together a handy guide on the 10 simplest DIY tasks you can take on right now.
1. Sort that Sink-Trap
The sink-trap is a great way for beginners to get an understanding of how plumbing works, as you’ll get a good sense of how kitchen pipes slot together – useful skills to build on in future when you tackle bigger projects!
The sink trap is that J-shaped pipe that connects your sink to the wall. Left to its own devices it’ll eventually get clogged, so make sure you prevent that from happening with some proactive cleaning. Start by unscrewing the slip-joint nuts on each side of the J-pipe – you should be able to do this by hand, though older more stubborn plumbing you’ll likely need a wrench. You’ll find a spongy ring around the pipe – that’s the O-ring – make sure you keep that safe. Remove gunk by tapping the pipe against an outside wall and using an old rag.
Reassemble the piping in this order – re-attach it to the wall, make sure the O-ring is in place, fix to the tap.
Pro Tip – put a bucket under the pipe in case of excess water – this can be a messy job!
2. Fix a Blocked Drain
Is your drain blocked? Don’t worry though – a blocked drain is one of the simplest DIY jobs to tackle because you don’t actually need special chemicals or tools to solve the problem. And once you’ve done it your drains will thank you! You’ll probably find most of what you need in the kitchen! Bicarbonate of soda and vinegar make for excellent drain cleaners. Simply pour bicarbonate down the blocked drain and flush through with the vinegar.
Pro Tip – if there’s still problems, use an old-metal coat-hanger to fish out any hair blockages. Sounds gross – but it’ll solve 99% of bathroom blockages!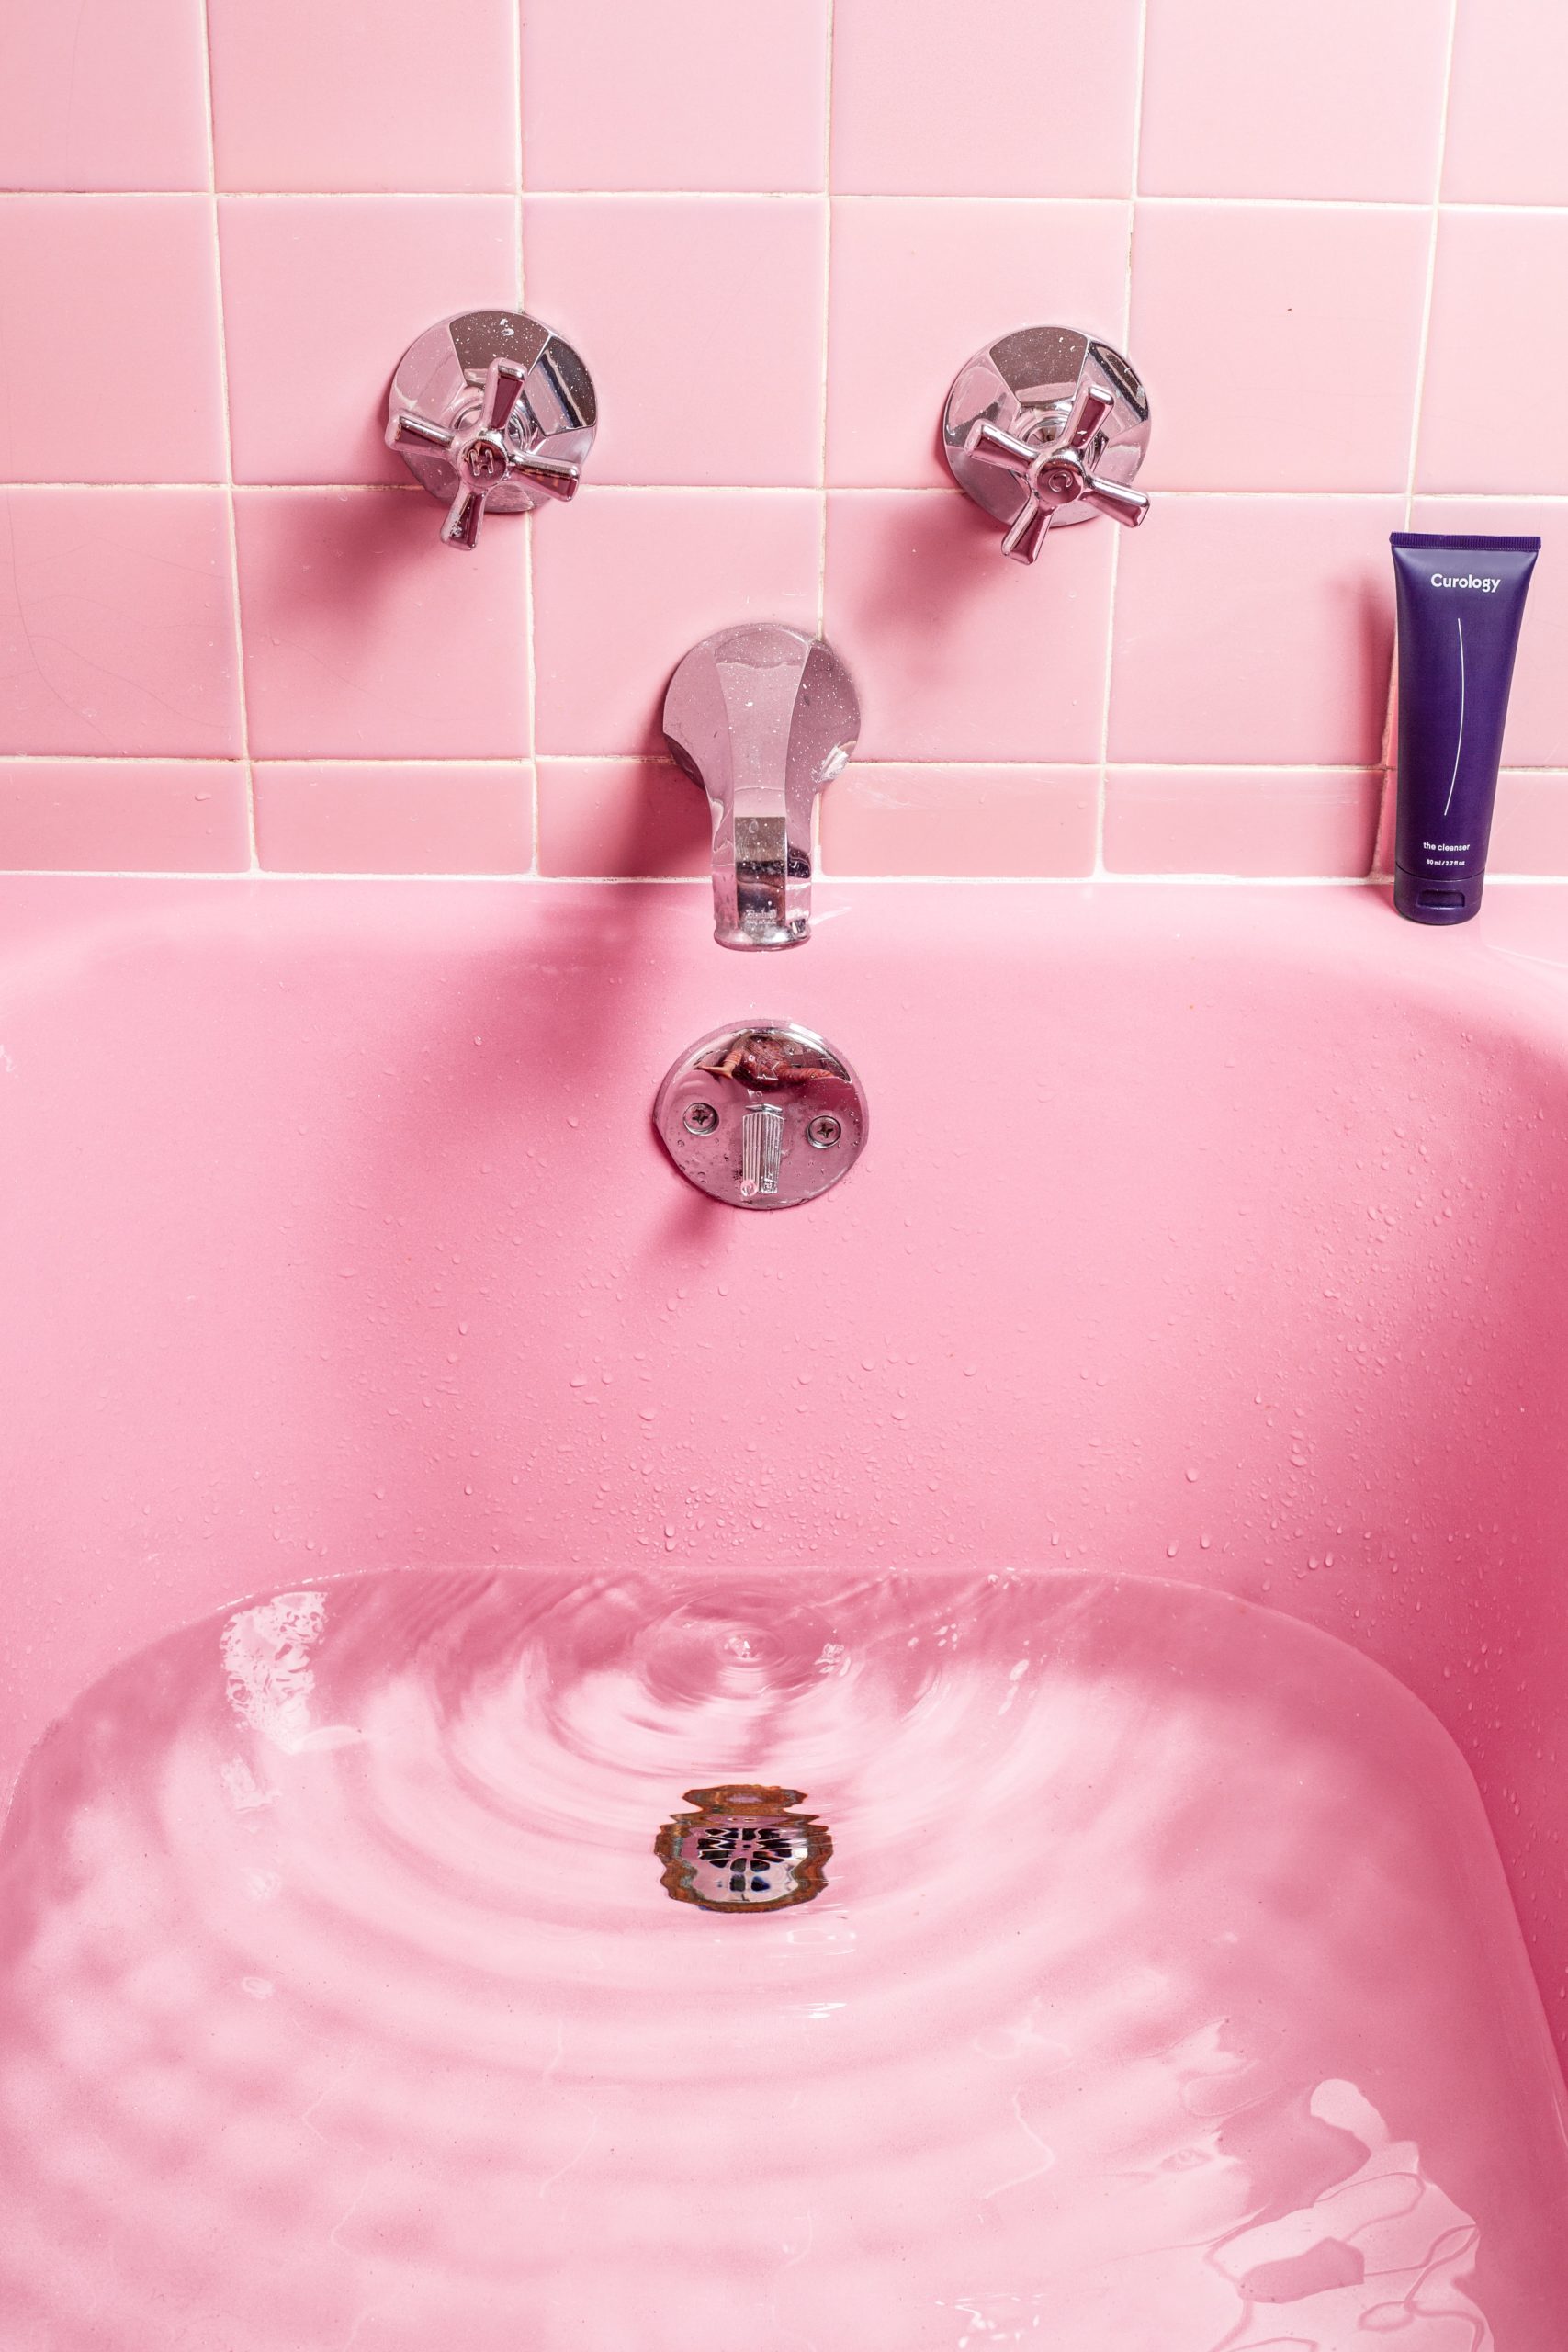
4. Reseal Your Bath
Use a Stanley knife to remove the old sealant, slicing through the top and bottom edges at one end before gently pulling the sealant from the wall. It should come out easily, but make sure to scrape off any excess.
You’ll need a cartridge gun to reseal. Fill your bath before resealing so the gaps between bath and tile are at their largest. Then with the cartridge gun, simply fill the gap in one smooth, consistent motion. After a day of leaving things to dry, you’ll be back to relaxing in no time!
Over time sealant rots away, which not only looks unsightly but can lead to leaks.
Nothing will ruin your bathroom bliss more than seeing that unsightly sealant every time you’re soaking in the tub.
Pro Tip – practice using the cartridge gun following a line on a piece of paper before you take on the tub.
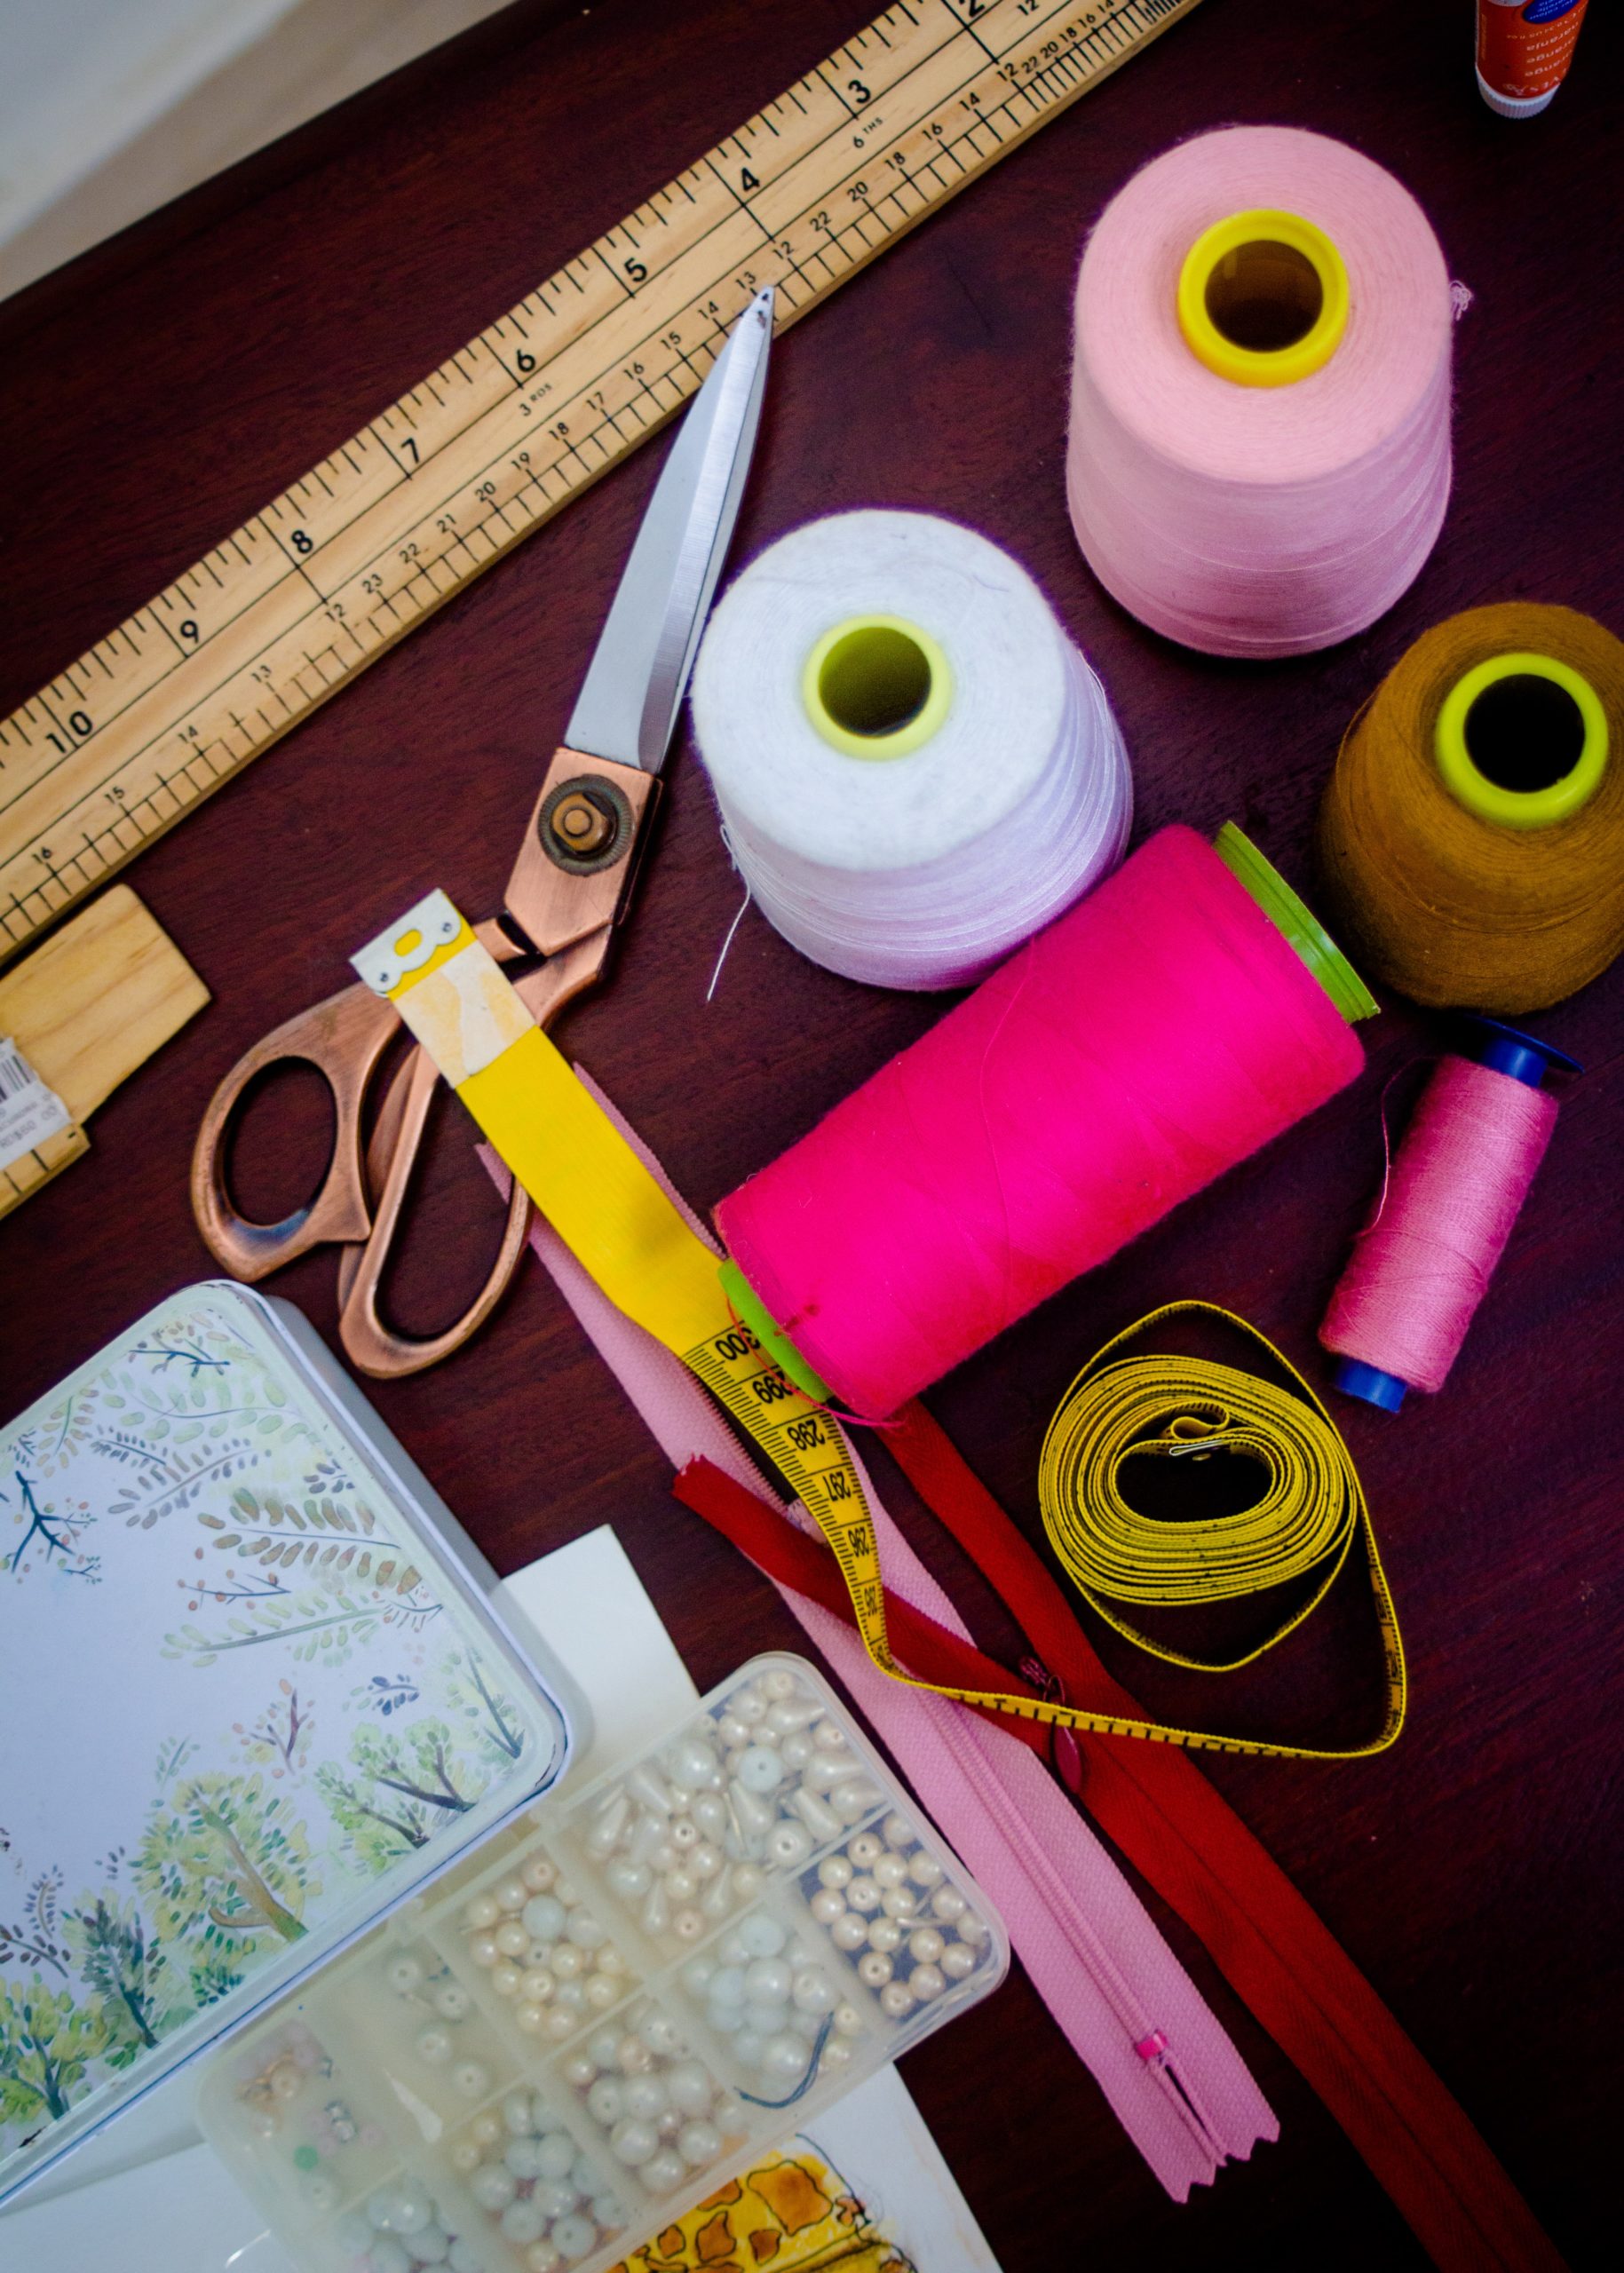
5. Start Sewing
Everyone has a sewing kit knocking about, and sewing is one of the most useful jobs you can learn. Some of the most effective DIY jobs are the smallest, and the trusty needle and thread is a vital part of any renovator’s arsenal. Plus, everyone has a sewing kit knocking about somewhere too! So dig yours out, and get yourself on Youtube to learn basic skills – start with button-fixing. But if you’re really struggling, try hemming first. Hemming is relatively easy and great for getting your clothes to fit perfectly. DIY doesn’t always mean going big.
Pro Tip – use a garment you were planning to throw away to practice
6. Repaint Wooden Furniture
Painting is one of the most relaxing DIY activities there is! If you’ve got an old table you were planning to throw away, why not repaint it instead? You’ll need to lay down a cloth for any excess paint. Sand down the table using a flexible foam sanding sponge or thick sanding paper, which you can find online.
And once you’ve sanded the piece down, seal the wood with a primer and leave to dry for an hour. Then paint in your colour of choice – go wild to really spruce the piece up, but remember you’ll need two coats. Repainting or even refinishing wooden furniture is a fantastic way to revitalise tired pieces and a great alternative to buying replacements.
Pro Tip – between coats, put your paintbrush in a plastic bag and stash it in the fridge. It’ll stay moist for the next day.
7. Tackle Leaky Taps
If your tap has started leaking, there’s probably a problem with the rubber mixer. To check if yours is ok, you’re going to have to swap your tap with another and test a different washer. Look for a little screw – it’ll either be under the hot and cold taps or behind the tap – and use that to take your tap apart. The best bet is to look up Youtube videos of your tap model.
Then, fit that onto your leaky tap and see if the problem persists. You’ll need to order a new washer online but don’t worry – you can get these very cheap! Getting to grips with taps is one of the easiest ways to broaden your plumbing horizons – you’ll be replacing showers in no time!
Pro Tip – always remember to shut off the water before you start plumbing jobs!
8. Make Your Own Bookshelf
You can easily make your own rustic bookshelves at home, by using wood found on your daily walk. You can make a pretty solid single bookshelf out of repurposed wood you can find on your daily walk. First, you’ll want to strip and sand the shelves down until you’re happy with the finish, taking care to sand down any awkward edges. To ensure your shelves are made to last, it’s worth treating the wood with a nourishing oil (just rub it in with an old rag, like you are waxing your car) and leave to dry before hanging your new upcycled shelves.
Pro Tip – If you’ve got access to a beach nearby, you might be lucky enough to find some driftwood, which will make for a charming, rustic addition to your home.
9. Hang Pictures
This is a job that requires very few tools, and it’s a great one to get started with. It doesn’t require many tools either! All you’ll need is a hammer and a nail. The trick is to know exactly where you’ll be putting the nail before you even pick up the hammer. Have a friend or family member hold the picture frame where you want it, and lightly mark the top centre edge. Use a ruler and work down.
Pro Tip – catch falling dust by using a folded over sticky-note as little trough
10. Tackle Draughts
So, you’ll need a piece of fabric that’s longer than the width of your door – start by rolling it into a tube and blocking off one end. Then stuff it with any old clothing you can find – tights and socks make a good shout. And if you don’t have socks to spare, use sand or lentils, which also make for great insulation.
Pro Tip – look online for tips on how to turn your draught excluder into a cuddly stuffed dog. Put those sewing skills to use again!
10. Fix Cracks
If they’re in moving parts of a wall, cracks will get worse over time. It’s best to fill these cracks with something called caulk. You can order it online fairly cheap. Once you’ve got the caulk, filling cracks couldn’t be easier. Then smooth off the excess.
Pro Tip – if you’ve got a really big hole in the wall, don’t be afraid to pad it with newspaper before filling with caulk. The newspaper gives the filler something to grab onto!